How to Use NetSim Cyber GUI
Overview
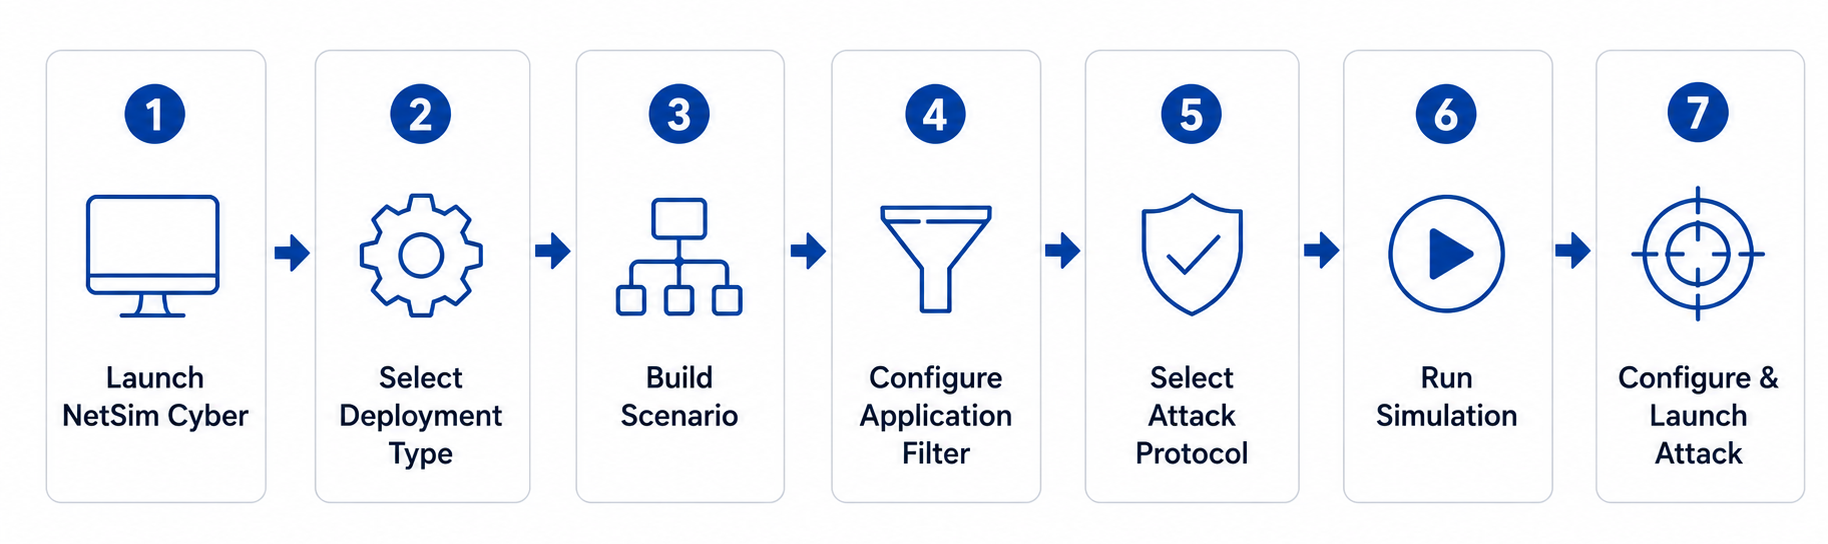
The NetSim Cyber GUI provides a guided workflow for configuring and running protocol-aware cyber attacks. The workflow begins by launching NetSim Cyber, selecting the appropriate deployment type, and building the communication scenario between the source and destination nodes. A Threat Agent is then placed in the communication path, an Application Traffic Filter is configured to identify the target protocol stream, and the required built-in or custom attacker is selected. After reviewing the Run Simulation summary, the simulation is started and the attacker interface is used to modify, or attack the selected live traffic stream
End-to-End Workflow
NetSim Cyber GUI workflow for configuring and running a protocol-aware attack experiment.
Step-by-Step Walkthrough
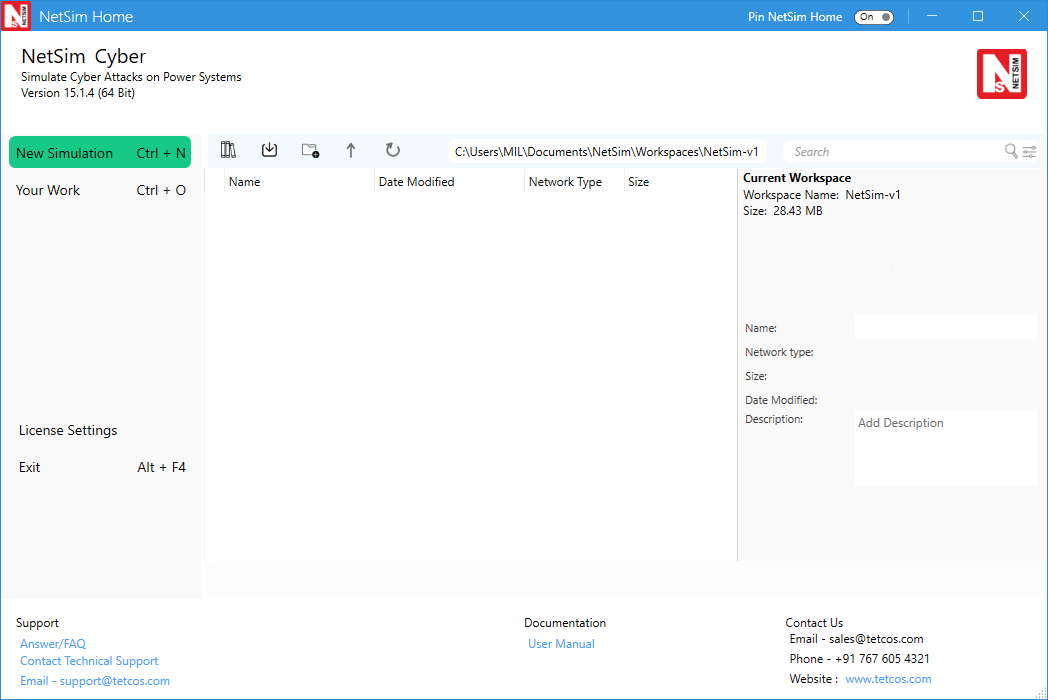
Launch NetSim Cyber
Start NetSim Cyber from the NetSim home screen. Open the required Cyber simulation or create a new simulation before configuring protocol traffic and attacks.
NetSim Cyber home screen showing the workspace and new simulation controls.
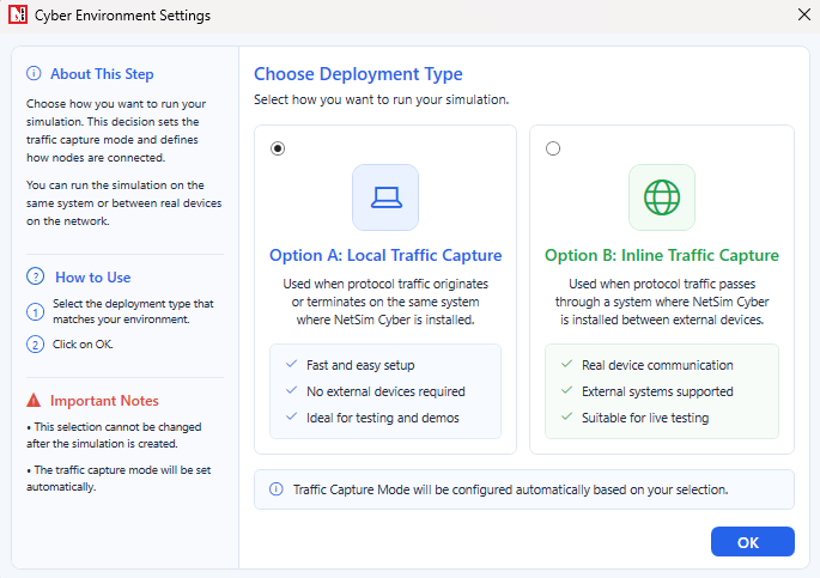
Select the Deployment Type
In the Cyber Environment Settings window, select the deployment type for the experiment.
Option A –Select this option when the protocol traffic originates from or terminates on the same system where NetSim Cyber is installed.
Option B –Select this option when protocol traffic passes through a system where NetSim Cyber is installed between external source and destination devices
Cyber Environment Settings window for selecting Local Traffic Capture or Inline Traffic Capture.
Build the Scenario
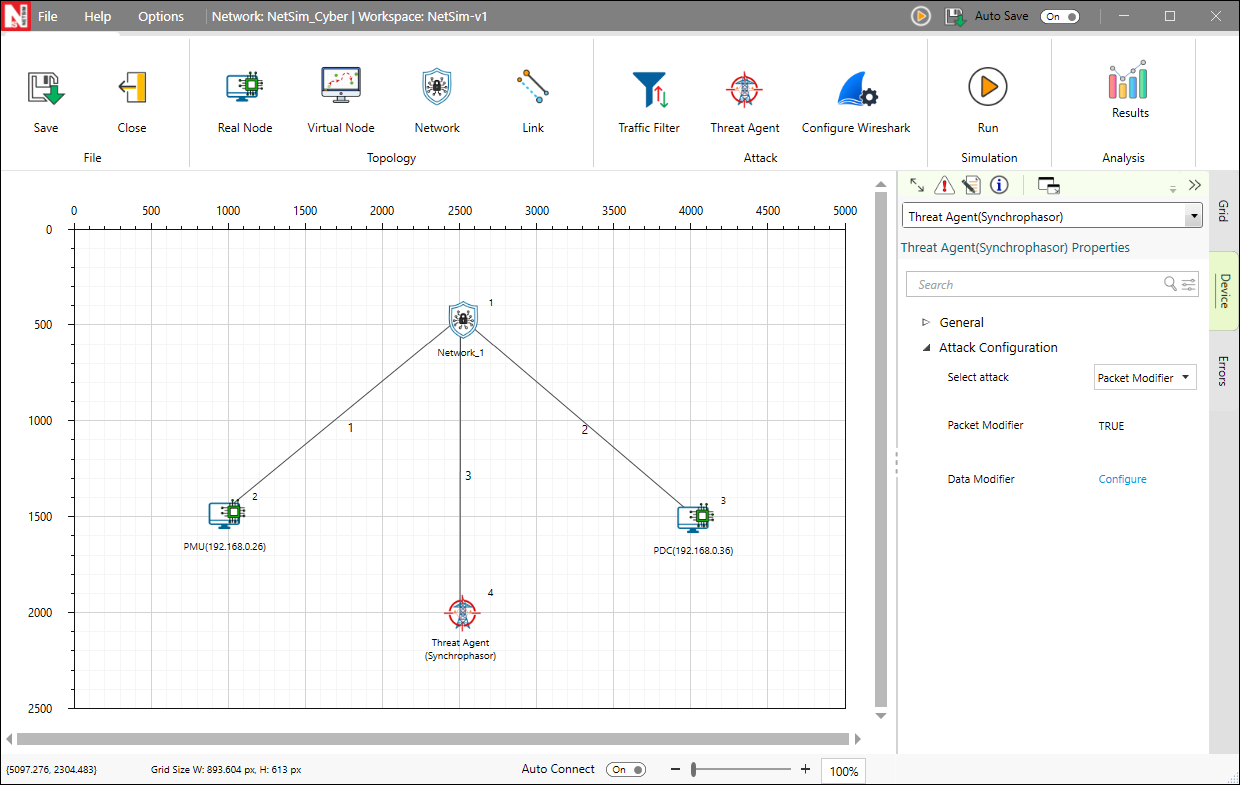
On the Grid, add the source and destination nodes and place a Threat Agent between them. The nodes are connected automatically when they are added to the scenario. Verify the scenario layout before proceeding to the next configuration step.
NetSim Cyber scenario canvas showing source and destination real nodes connected through the network path with a Threat Agent placed for protocol attack execution.
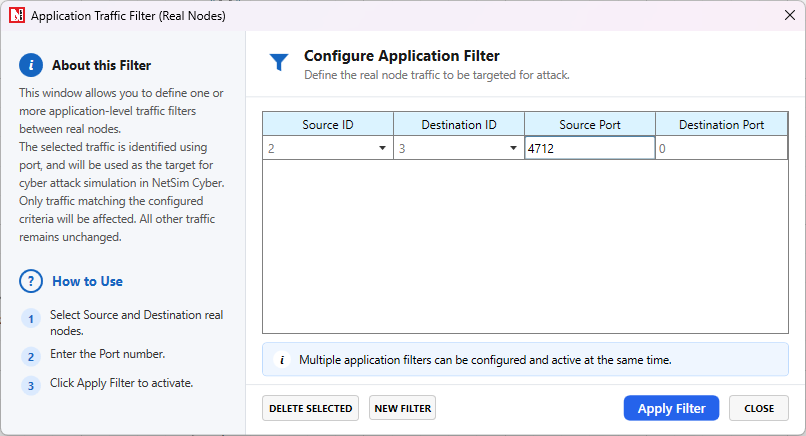
Configure the Application Traffic Filter
Configure the source node, destination node, protocol, and port so the Threat Agent applies the attack only to the intended traffic stream. Typical ports include Modbus TCP 502, DNP3 20000, and the configured synchrophasor PMU/PDC TCP port such as 4712 or 1410.
Application Traffic Filter window used to map source node, destination node, and protocol port.
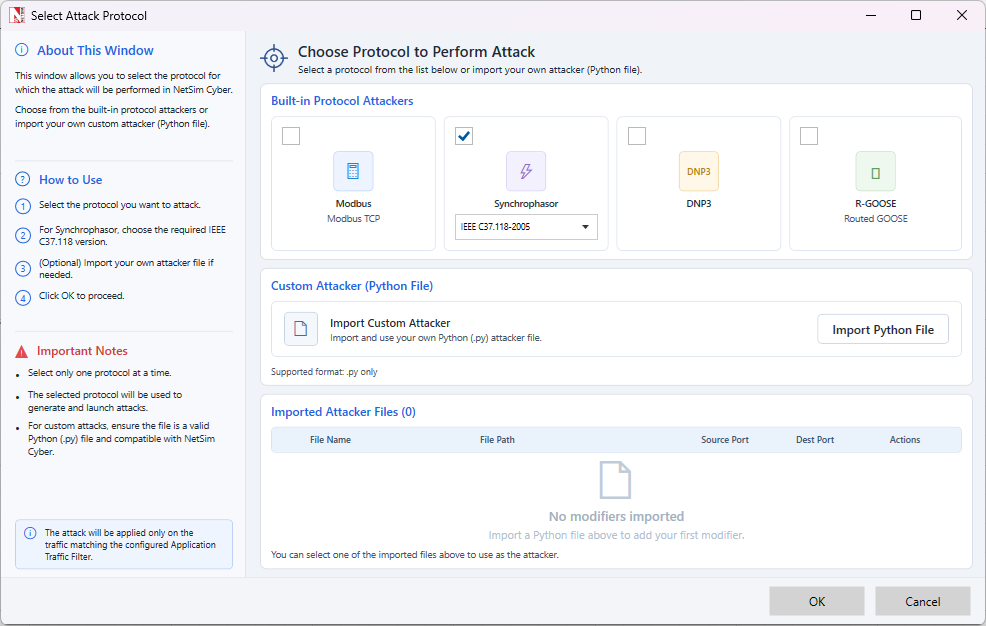
Select the Attack Protocol
In the Select Attack Protocol window, choose the built-in attacker that matches the traffic generated by the experiment:
Modbus: Modbus TCP traffic
Synchrophasor: IEEE C37.118 traffic, with the required 2005 or 2011 profile
DNP3: DNP3 master/outstation traffic
Routed GOOSE: IEC 61850 GOOSE traffic routed through NetSim Cyber
If the required behavior is not covered by a built-in attacker, import a compatible custom Python attacker.
Select Attack Protocol window showing built-in protocol attackers and custom attacker import.
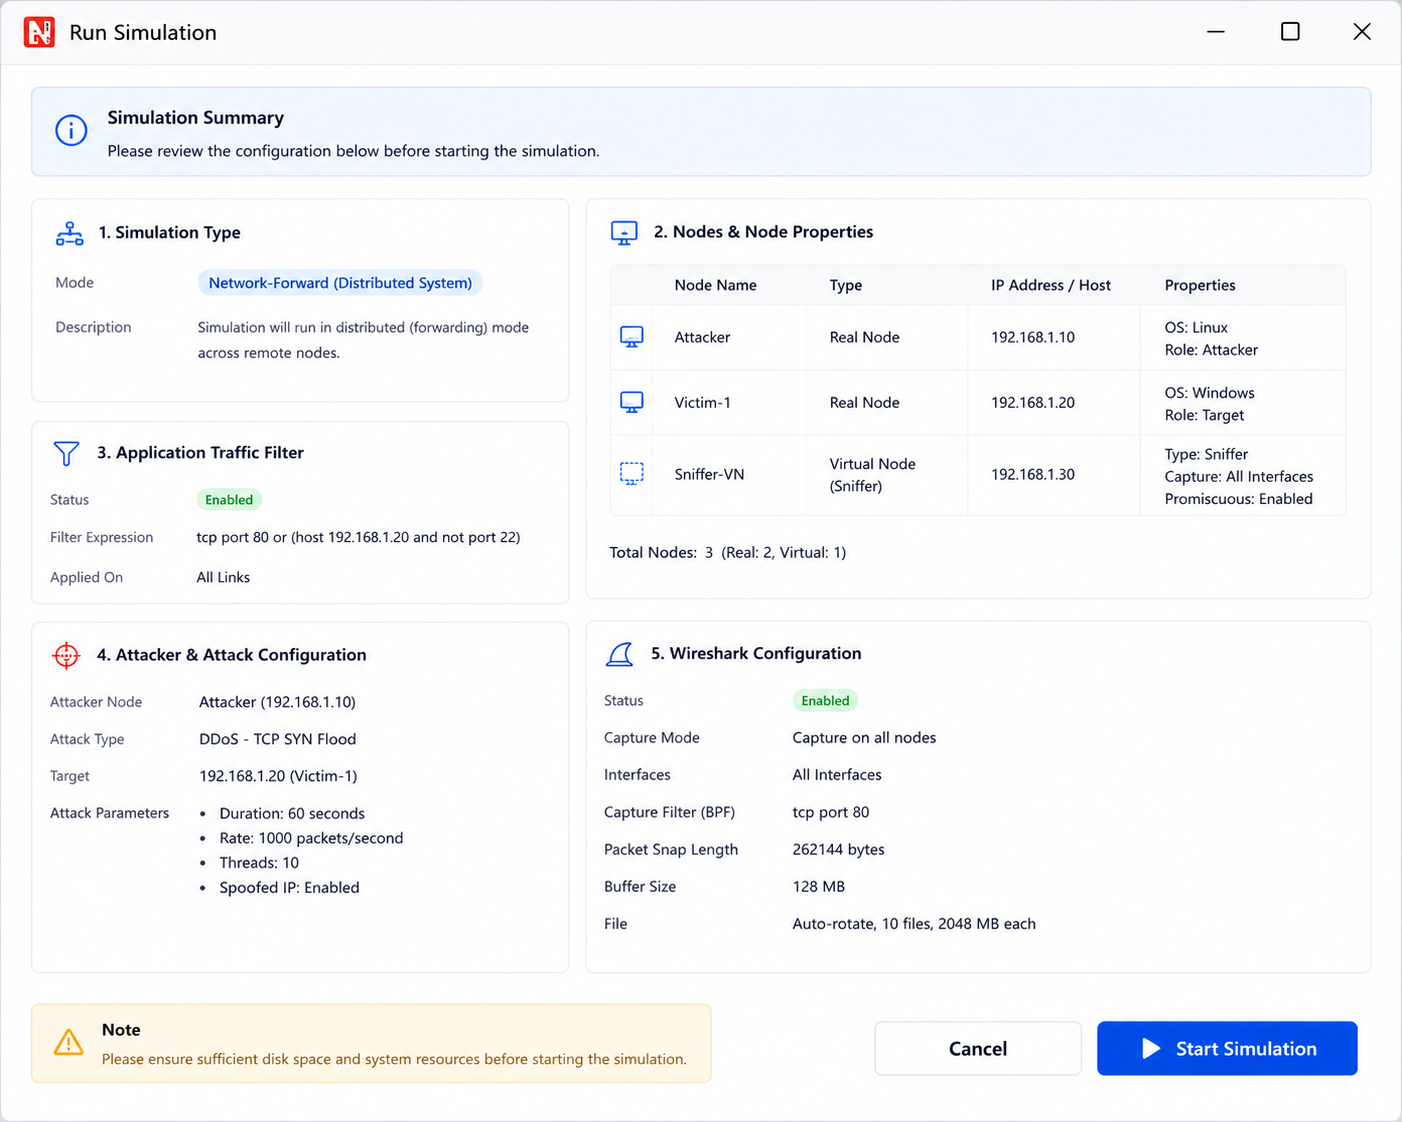
Run the Simulation
Click Run Simulation. NetSim Cyber starts the configured scenario, opens the required console or attacker windows, and waits for the selected live traffic stream. Start or restart the external simulator traffic only after the NetSim Cyber experiment is ready.
Run Simulation summary window showing node mapping, application filter, and attacker configuration.
Configure and Launch the Attack
When the attacker UI opens, select the attack type, enter the required parameters, and click Start Attack. Use Modify to update parameters while the attack is active, or Stop Attack to restore normal traffic forwarding.
IEEE C37.118.2-2011 attacker UI with automatic, manual, replay, and attack-control options.
Note: Each protocol has its own attacker UI and parameter set. For Synchrophasor experiments, start NetSim Cyber and keep the attacker ready before starting PMU-PDC traffic, because the first CFG frame is required to load the stream and phasor mapping.