Installation and License Server Set-up
System Requirements
NetSim Client (installs locally)
Hardware: i5 equivalent or above, RAM: 8 GB (Min). 16GB Recommended.
Monitor Resolution: Minimum – 1366x768, Maximum – 1920x1028. Optional Scale and layout setting: 100%
Operating System: 64 bit. Win 10, Win 11, Language English
Software: MS Office, Adobe Reader
Development Tools: Visual Studio
NetSim v8 / v8.1 / v8.3 / v9 / v9.1: Microsoft Visual Studio 2010 (or higher)
NetSim v10 / v11 / v11.1: Microsoft Visual Studio 2015 (or higher)
NetSim v12 / v12.1 / v12.2: Microsoft Visual Studio 2019 (or higher)
NetSim v13 / v13.1 / v13.2 / v13.3: Microsoft Visual Studio 2022 (or higher)
NetSim v14.0 / v14.1 / v14.2 / v14.3/v14.4/15.0: Microsoft Visual Studio 2022
Visual Studio Community edition (or higher) is required for writing and debugging custom code.
License Server
This is applicable when running Host-ID/Dongle-locked floating licenses and is not applicable for node-locked licenses.
Any one system will have to be made as the license server, and it is to this PC that the license is locked, either via its MAC ID or via a dongle. The dongle is a USB device which controls the licensing. The system(hardware/OS) requirements are same as that applicable for NetSim clients. USB Port is required for connecting and running the dongle. Client systems should be able to communicate with license servers through the network.
Installing NetSim
Install 64-bit build of NetSim. The start window will show (i) Version type (Pro, Standard, Academic), (ii) Version Number and build number (Eg: 15.0) followed by (iii) Currently supports 64bit in v15.0.
For example, you will see Network Simulator for a Standard version to install. Note that the installation must be performed in administrator mode. Right click on the setup file and click on the Yes to proceed with the installation.
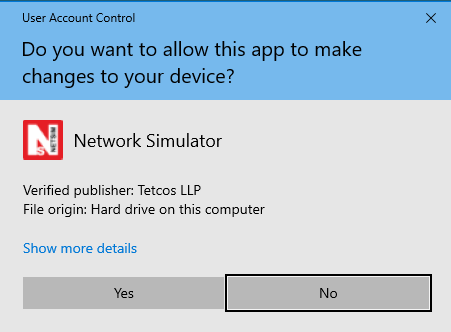
User Account Control message window appears and select Yes.
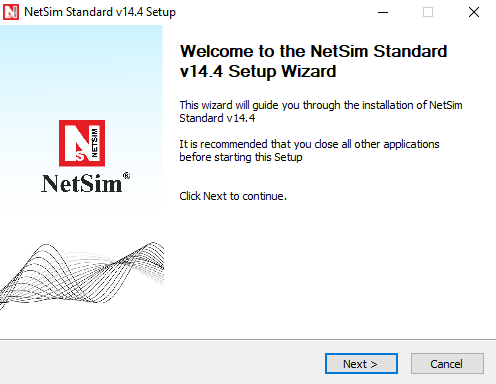
Setup prepares the installation wizard and software installation begins with a Welcome Screen. Click on Next to continue with the installation.
Select Next to continue with the installation.
License agreement will be displayed. Read the agreement carefully, scroll down to read the complete license agreement. Click on I Agree else quit the setup by clicking Cancel.

Select I Agree in NetSim License Agreement window
If you agree with the license agreement, you will be prompted to select either one of the installation options, Express (Single-click installation) or Custom (Step-by-Step installation).
Express Installation will install the third-party tools silently along with NetSim without displaying any prompts for the user.
Custom Installation is a step-by-step approach in which a user will be prompted to carry out the installation process and the same applies to the installation of the third-party tools which happens alongside NetSim. Both the installation methods are explained below:
Express Installation

Select Express (Single click) radio and click on install
NetSim installation starts, and users can see that the third-party tools download information window click on OK to proceed with the installation.
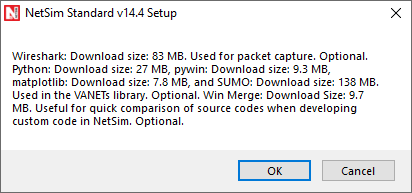
Click on the OK to proceed installation process of NetSim
Third-party tools, including Wireshark, SUMO, Python, WinMerge, PyWin, and Microsoft .NET, will begin installation .Before that, the installer will look for the third-party tools at the same folder where NetSim.exe is present if found, the next step of installation proceeds.
Else, the third-party tools will get downloaded from our NetSim servers and installed if the PC/VM
is connected to the Internet
Sumo is being downloaded. |
Python is being downloaded |
|---|---|
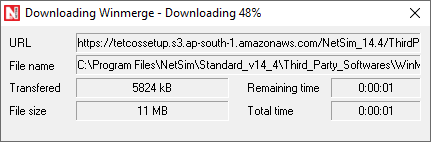
Winmerge is being downloaded |
Wireshark is being downloaded |


NetSim installation starts, and users can see that the third-party tools get installed one by one.
Pywin and matplotlib will be installed through command line.

Wireshark gets installed silently

Python gets installed silently
Sumo gets installed silently
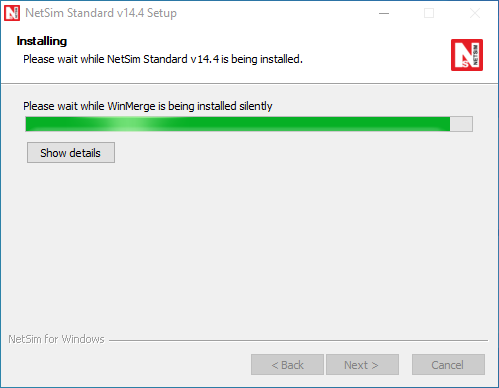
Winmerge gets installed silently
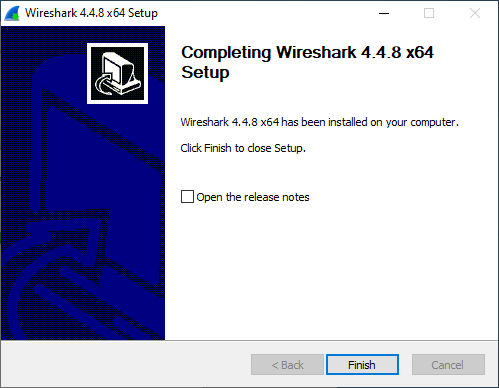
After the third-party installations, NetSim installation proceeds. Once it is completed, NetSim-complete setup wizard appears as shown below. Click on the Finish to complete the installation process of NetSim.

Select Finish to complete the installation process of NetSim.
Custom (Step-by-step) installation

Select Custom Radio
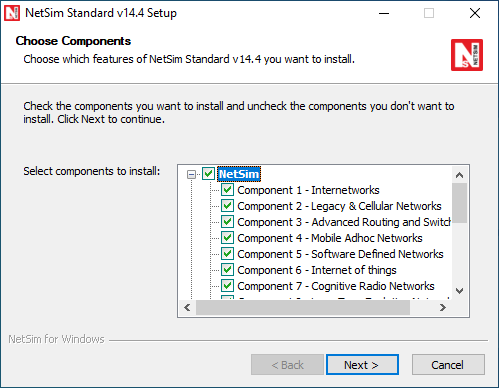
Now the user will be prompted to select the components to be installed. The list of components is available for selection and assembly only in the Standard and Pro versions of NetSim. NetSim Academic version is available as a single package.
Note: In Standard and Pro Versions of NetSim, the Choose Components screen will display only those components for which the licenses are obtained by the user. Network Emulator is available as add-on.
list of components is available for selection and assembly only in the Standard and Pro versions
Note: Select all the supporting applications for complete installation of the software as shown below:
Click on the Next.

Figure 2‑17: list of third-party tools
Note: Winmerge comes only as a part of Standard and Pro Version Install.
In the next screen, you will be requested to enter the installation path. Select the path in which the software needs to be installed and click on Next .
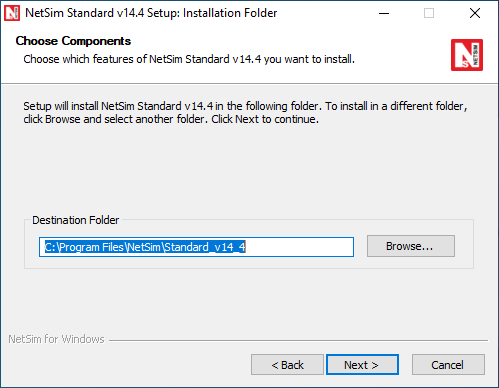
NetSim installation directory path
In the next screen, you will be requested to enter the Start Menu folder name. By default, it shows NetSim Standard for Standard version install of NetSim. Click on the Install to start the installation.

Start Menu folder name
The installation process begins.

NetSim std v14.4 being installed.
After the installation of required NetSim files, the installation of third-party tools begins.
For NetSim Academic Version, Npcap and Wireshark will be installed.
For NetSim Standard and Pro Versions, along with WinPcap and Wireshark installation, Dot net, Sumo, Python installation will start automatically. (If not deselected during 3rd party software selection)
If the PC/VM is connected to the Internet third party tools will get downloaded from our NetSim servers (If the third-party tools are not found in folder where NetSim.exe is present) and proceeds with installation.
Click on Install to start Dot NET (.NET) installation

Select install to install Dot NET (.NET)
Installation process begins.

Dot NET (.NET) installation begins
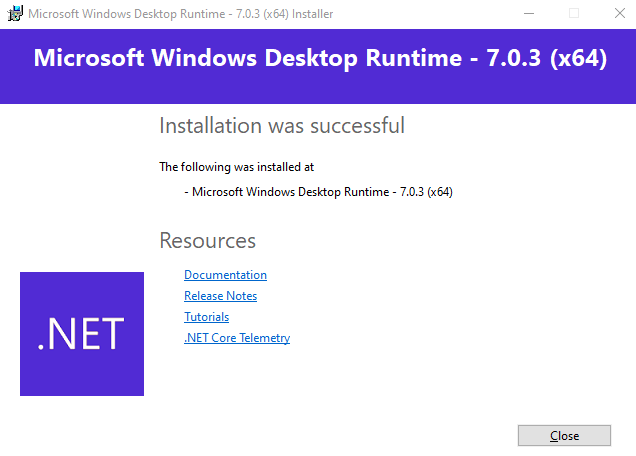
Dot NET (.NET) installation successfully completed
After the successful installation of Dot NET (.NET) and click on close then Wireshark installation window appears. Click on Next to begin

Select Next to start Wireshark installation
Wireshark License Agreement appears. Click on the I Agree.

Wireshark License Agreement window
Make sure that all the components are selected and click on Next.

Choose Wireshark features
Click on Next.

Select Next
Select the path in which Wireshark needs to be installed and click on Next.

Wireshark installation directory path
Select Install Npcap 1.80 and click on Next.
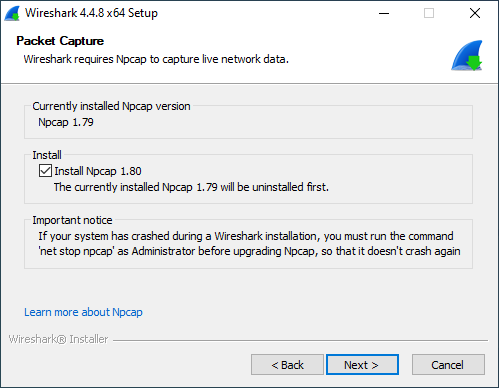
Select Install Npcap 1.80 in Wireshark window
Select Install USBPcap 1.5.4.0 and click on Install.

Select Install USBPcap 1.5.4.0 in Wireshark window
The installation process begins.

Wireshark installation process begins
Npcap License Agreement window appears. Click on I Agree and proceed with the installation.
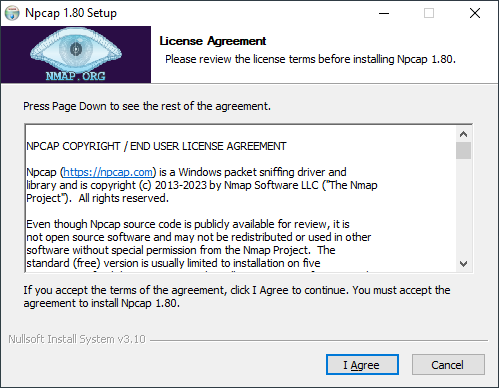
Npcap License Agreement window
Installation Options window appears. Simply click on Install.
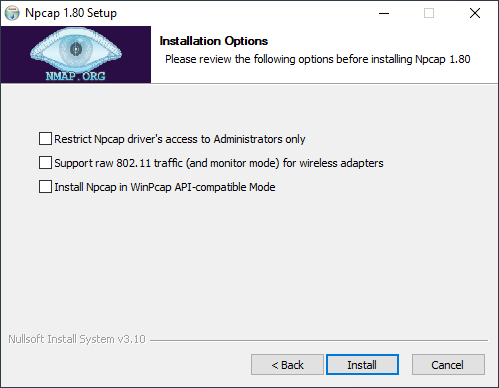
Npcap Installation Options window
Npcap Installation begins.

Npcap installation
The Installation Complete window appears. Click on Next to proceed.

Npcap installation is complete
USBPcap Driver License Agreement window appears. Click on I accept the terms of the License Agreement check box and click on Next.

USBPcap Driver License Agreement window
USBPcap CMD License Agreement window appears. Click on I accept the terms of the License Agreement check box and click on Next .

USBPcap CMD License Agreement window

USBPcap installation is completed
The Installation Complete dialog box appears once the installation process is completed successfully. Click on the Next .

Installation Complete dialog box and select next
You will get the Wireshark Completing Setup window. Select the option I want to manually reboot later.
Select the option I want to manually reboot later and Click on Finish
This completes the Installation of Wireshark software. NetSim complete Setup wizard appears as shown above. After click on Finish to begin with WinMerge installation.
Next the WinMerge License Agreement appears. Click on Next.

WinMerge License agreement window
Select the path in which WinMerge needs to be installed and click on Next .

Select the location where should WinMerge be installed
Once WinMerge installation completes, click on Finish .

Click on Finish to completes WinMerge installation
Click on Next to start SUMO installation.

Sumo Installation starts
SUMO License Agreement appears. Accept the terms in license agreement and click on Next to proceed installation

SUMO License Agreement window
Once SUMO installation completes, click on Finish.
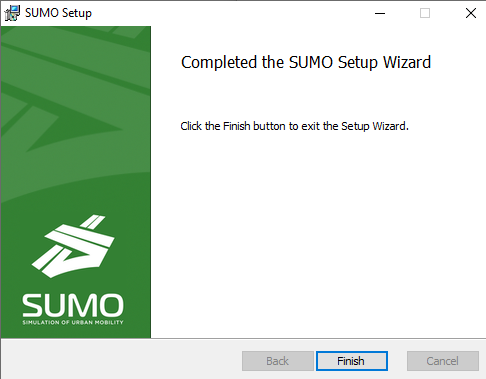
Complete SUMO Installation
Click on Next to start with Python 3.12.2 installation.
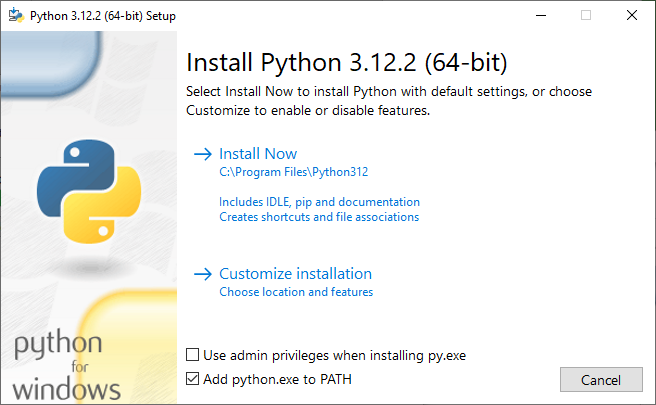
Select “install Now” option to install Python
The installation begins once you click on the Install option.

Figure 2‑48: Python installation begins.

Python installation successfully completed.
Once the installation is finished, click on Close to start the installation pywin 32
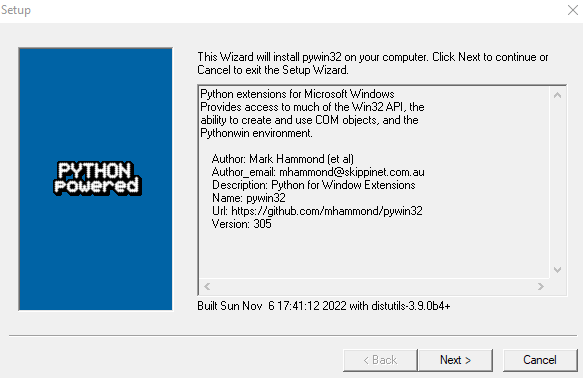
pywin 32-224 installation wizard window
Click on Next to select the directory to be used.

Python directory path
Click on Next to start the installation.
Select Next to install of pywin32
Once the installation is finished, click on Finish.
Select Finish to complete pywin installation
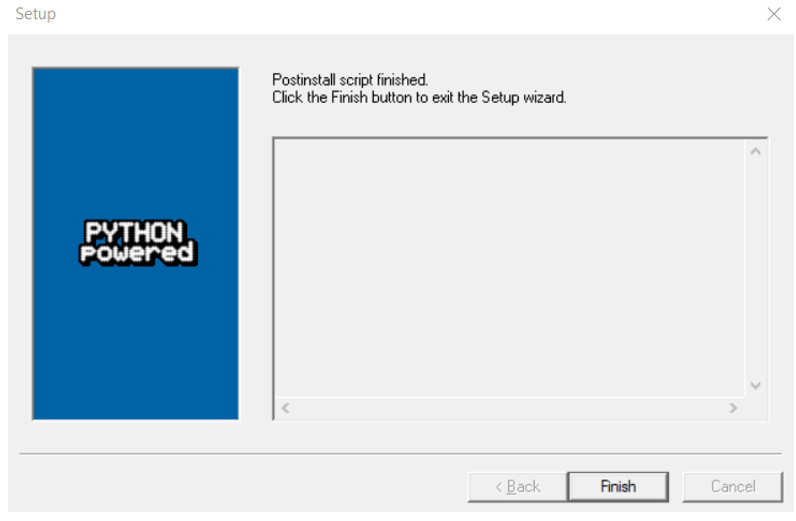
This completes the Installation of pywin software. NetSim complete Setup wizard appears as shown below. Click on Finish to complete the installation process of NetSim.

NetSim complete Setup wizard
After this, to run NetSim, double click on the NetSim icon present in the desktop or right click and choose Run as administrator option. A NetSim License Server Information screen appears to start with NetSim.
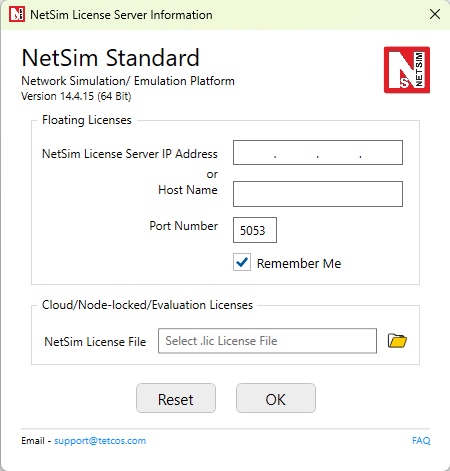
Enter NetSim License Server IP Address/Host name/Select NetSim License file
Enter the NetSim License Server IP Address, i.e. the system in which the License files are present and the rlm.exe file is running (Refer Section 2.3 to set up NetSim License Server).
In the case of Cloud/Node-locked/Evaluation license browse the provided LIC file and click on OK. Once this is done, NetSim Home screen will appear.
Silent installation
Steps for silent installation in NetSim are as follows.
For example, let us take the NetSim_Standard_14_4_15.exe setup. Right click on NetSim Standard 64-bit setup 🡪 Go to properties and copy the Location as shown below.
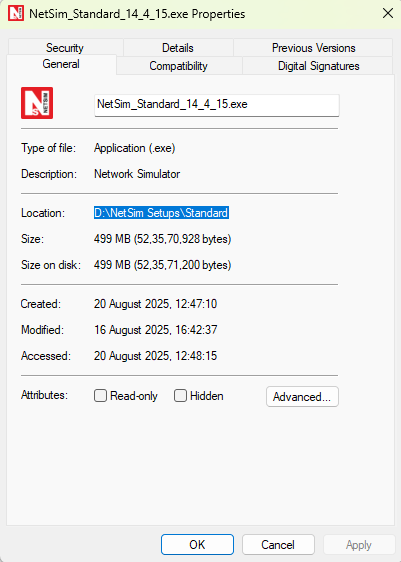
Figure 2‑56: NetSim Standard 64-bit setup location
Open command prompt and paste the copied location as shown below.
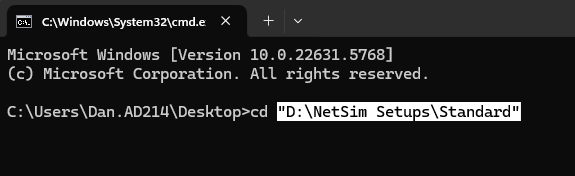
Figure 2‑57: Enter setup location in command prompt.
Run/Execute Command with the following parameters:
To install NetSim along with all third-party tools:
“NetSim_Standard_14_4_15.exe”/S /silent=1
/S: Runs the NetSim installer silently.
silent=1: Installs NetSim and all third-party tools (Wireshark, Npcap, SUMO, and Python).

Silent installation command in command prompt
To install only NetSim and skip third-party tools:
“NetSim_Standard_14_4_15.exe”/S /silent=0
silent=0: Installs only NetSim, skipping third-party tools.
Useful for environments where third-party tools are installed separately or not required.
Press the Enter key. The following User Account Control message window appears. Click on Yes to begin silent installation of NetSim.

Figure 2‑59: User Account Control message window appears and select Yes.
Note: Complete installation of NetSim may take up to 2 or 3 minutes.
Setting up License Server
Installing NetSim RLM Dongle Driver Software (Dongle Based Licenses)
This section guides you to install the RLMDongle Driver software from the CD-ROM.
Insert the CD-ROM disc in the CD drive.
Double click on My Computer and access the CD Drive.
Double click on Driver Software folder.
Double click on HASPUserSetup.exe
Each prompt displayed during the process tells you what it is about to do and prompts to either continue or exit.
Setup prepares the installation wizard and the driver software installation begins with a Welcome Screen. Click on Next.
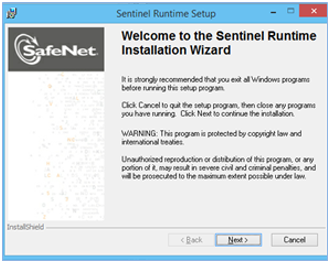
Sentinel Runtime Setup window and select Next
Note: Any other program running during the installation of the Dongle will affect the proper installation of the software.
Sentinel Runtime Setup License Agreement appears. Read the license agreement carefully, scroll down to read the complete license agreement. If the requirement of the license agreement is accepted, Click on I accept the license agreement and click on Next else quit the setup by clicking Cancel .

Figure 2‑61: Sentinel Runtime Setup License Agreement window appears and select Next
The installation process begins.
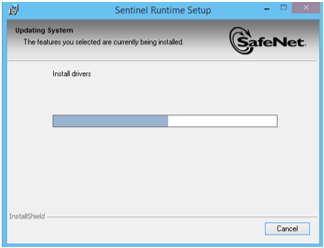
Figure 2‑62: Installation process begins
Once the Sentinel Runtime is installed successfully, click on Finish.

Figure 2‑63: Sentinel Runtime is installed successfully and select Finish
Now the RLM driver software is installed successfully. If the driver has been successfully installed, then upon connecting the Dongle in the USB port, a red light will glow (Refer picture below Figure 2‑66). If the driver is not properly installed, this light will not glow when the dongle is connected to the USB Port.

Figure 2‑64: Connecting the Dongle in the USB Port
Running NetSim License Server
Copy the NetSim License Server folder and paste it onto the desktop. Check that it has the license file. If not copy the paste the license file into the License server folder
Double click on NetSim License Server folder from Desktop.
Double click on rlm.exe
For hardware dongle-based users: After the Driver Software installation, connect the RLM dongle to the system USB port. Double click on My Computer and access the CD Drive. This CD contents will have the NetSim License server folder.
Note: For running NetSim, rlm.exe must be running in the server (license server) system and the server system IP address must be entered correctly. Without running rlm.exe, NetSim won’t run.
While running rlm.exe, the screen will appear as shown below Figure 2‑67.

When NetSim license server system running, window appears
Running NetSim Software
After running rlm.exe, double click the NetSim icon in the Desktop. The screen given below will be obtained. Enter the Server IP address where the rlm.exe is running and click OK.
Enter NetSim License Server IP Address .
.